 Get one up on Rumpelstiltskin by turning plastic shopping sacks into uber-artsy bookmarks.
I really hate giving cash gifts. Gift cards aren’t much higher on the “Hey, I burned lots of calories thinking of you” scale. Even when the card’s end use fits the user, it’s still not very satisfying for me (wow, so it is always about me?). Do you also need to up the personalization ante? Here’s the recipe for what’s accompanying all those bookstore gift cards flying out of our house this holiday season:
 The Rules:
- Don’t burn yourself.
- Don’t burn anyone else.
- At all times keep your plastic sandwiched between the limits of the parchment paper. You do NOT want molten trash to come in contact with anything other than parchment. The project isn’t very “green” if you have to replace your iron, your ironing board, or get a skin graft.
The Research:
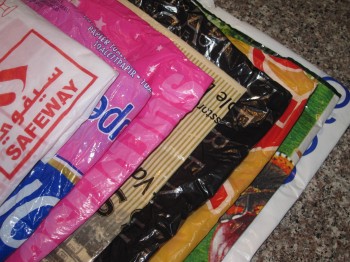
Plastic shopping bags come in different breeds: posh-store thick, biodegradable, made-from-recycled-materials, and your basic landfill fodder. That last one is what you’re looking for. Get some clear plastic bags too: here’s where posh-store deluxe is useful as a thick clear sheet makes a fine coating layer.
 The Recipe:
1. Crank up some music.
2. Grab your iron, a bunch of plastic bags, and 2 sheets of parchment paper. It has to be non-stick (unwaxed) baker’s parchment, available in rolls or sheets in every supermarket next to the wax paper and foil.
3. Cut up the bags. You might cut shapes. Maybe you’ll spot some words or printed images that appeal. You could get ziggy and aim to actually make A Picture. I just go with Chaos Theory.
4. Cut two equal sheets of parchment. Size doesn’t matter, maybe as big as a magazine cover? This will be the area you’ll work within.
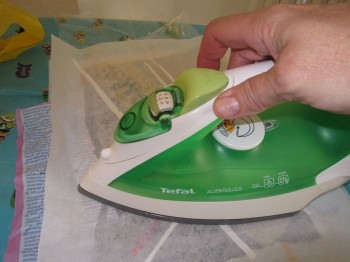
5. Plug in the iron and warm to a medium-ish setting. Lay one of the parchment sheets on the ironing board. Next lay on a clear piece of plastic (smaller than the parchment). Like making a pizza, add additional pieces of colored bags. Aim for about 4 or 5 layers across the entire piece. Top with another large sheet of clear plastic. Finally, cover everything with the second sheet of parchment.
![]() 6. With a smooth gliding motion and a firm pressure, move the iron across the parchment. Keep it moving, don’t linger in one place. Maybe 20 – 30 seconds into this, stop ironing. Feel it sort of melting together? Give the piece a few seconds to cool, then flip it over and repeat the ironing in the other side. Let it cool again. Carefully peel off the parchment.
6. With a smooth gliding motion and a firm pressure, move the iron across the parchment. Keep it moving, don’t linger in one place. Maybe 20 – 30 seconds into this, stop ironing. Feel it sort of melting together? Give the piece a few seconds to cool, then flip it over and repeat the ironing in the other side. Let it cool again. Carefully peel off the parchment.
 7. Happy with the result?
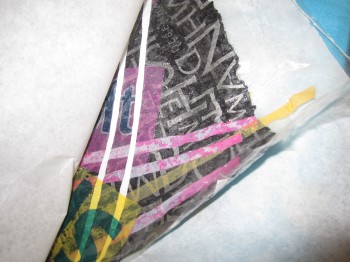
If not, or if the sheets haven’t sufficiently fused, return the piece between the parchment and iron some more, or try again with new materials, and maybe iron less, or at lower/higher heat. Trial and error is the name of this game. You can add layers to thicken the “fabric” or to change your design. I have better success when I add a clear plastic topping before each re-ironing. Gives things a bit more structure. Experiment.
8. Cut the cooled sheet into any desired shape. The rectangle, of course, is a classic.
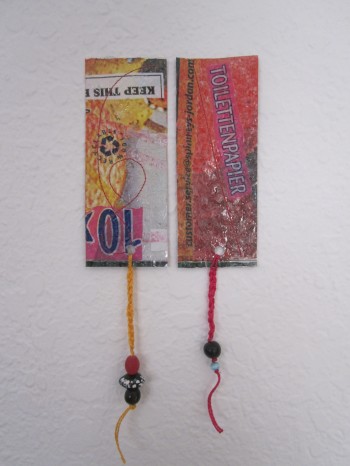
9. For you Overachievers: punch a hole in an end, thread through some ribbon or make a chain of colorful embroidery thread. Knot on some beads or oddments (bottle caps, random buttons). The samples shown were also machine top-stitched in a ridiculous curlicue pattern…because I had nothing better to do.
10. And for you Barking Mad Crafters: now that you know how to fuse trash into super-strong plastic fabric, you can make all sorts of cool stuff. Check out craft websites Etsy and Dawanda to see how far your people have taken things.
One man’s trash is another man’s bookmark!


way cool – will be making stuff from this technique – thinking earrings and maybe sunglass cases (fold and sew a seam!) – thanks!!!
Would love to see what you make with this technique! Please send pictures!
thank you for info. you give me that i search all day